
Dog
Tips to Keep Your Dog Safe in Any Temperature
December 30, 2022
Activities For Your Dog
January 15, 2018
Whether your dog is aging, small or just not a climber, you’re probably accustomed to lifting them onto the bed, the furniture or into the car. After lifting them for months, I needed a new solution. The search for an affordable dog ramp commenced. Prices started at $100 for a simple ramp and this was simply out of my price range. I then decided I could make my own dog ramp.
The DIY dog ramp was exactly what I needed. It was sturdy and lightweight. We adapted our dog ramp from Dogsaholic. It can be placed anywhere your dog needs an extra boost – and proved to be immensely helpful in my household.
The first step is to calculate the length and angle you want the ramp to be at. To do that, measure the distance between the top of the bed or couch and the floor at an angle you feel suits your dog. Make sure it’s not too steep. Take the measurement and add 4” to it.
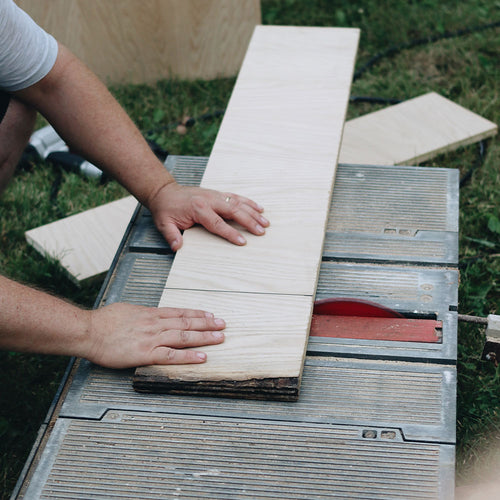
After that, take the desired length of your ramp and mark it with pencil on the 2”x2” lumber. Use your saw to cut to the length you want for the ramp. These pieces will become your frame for your ramp.
Next, take the plywood on a flat surface and position the two frame boards approximately 12 inches apart on the plywood. Measure and mark the length and width that will fit the frame boards, cut the plywood as marked.
Cut the rest of the 2”x2” pieces of wood to 12 inches in length to create steps to make your ramp easier to climb. Then, nail the plywood to the top of the frame using a hammer and nails.
Take the 12” pieces you cut and position them evenly along the length of the plywood. Nail them down firmly.
Once your ramp is constructed sand down any rough edges and check for anything you may have missed that could poke your dog.


